With our new models we will now create In this part your are going to instantiate a list of 2 equipments. We will create an organ for each equipment. Each one will have an automate which changes its hydrometry virtual sensors in the database and create two "organs" of the system that will simulate the sensor behavior. Each organ will simulate changes of hygrometry and temperature. Equipment 1Make
- Create a
folder named equipment1 and the file - new folder spinal-organ-sensor1 and within it a file named index.js
in it.| Code Block |
|---|
| ~/button-system$ mkdir equipment1
~/button-system$ cd equipment1
~/button-system/equipment1$ touch index.js |
This organ will create the first equipment and will revover data from a simulated sensor. equipment1/index.js- .
- in the index.js file:
- Require spinal-core.
- Get the connection parameter from the config.js file in the main folder
- Create a function addItem. This function create, set and add an item to the list given in argument.
- Create a function simulate. This function simulate the value of the sensor.
- Create a function onSuccess. This function will be executed if the loading of ‘List’ is successful.
- Create a function onFaill. This function will be executed if the loading of ‘List’ fail.
- Load list from spinal-core.
- Create a new folder spinal-organ-sensor2
- Copy paste the index.js into sensor2 folder and do the appropriate modifications.
- Don't forget to install spinal-core-connectorjs from GitHub in the two folders
| Panel |
|---|
| - If you have and API to retrieve the real data of your sensor use it to send real data to the graph.
- You can run every sensor independently by running the corresponding index.js (node index.js)
|
Your file spinal-organ-sensor1/index.js should look like this. | Code Block |
|---|
| language | js |
|---|
| theme | DJango |
|---|
| title | spinal-organ-sensor1/index.js |
|---|
| linenumbers | true |
|---|
| // |
1: RequirementRequirements and connection
const spinalCore = require('spinal-core-connectorjs');
const models = require('../spinal- |
model-buttonmodelconsole.log("Configuration Environment not found, using default config");
process.env.SPINALHUB_PORT = 7777;
process.env.SPINALHUB_IP = "127.0.0.1";
process.env.SPINAL_USER_ID = 168;
process.env.SPINAL_PASSWORD = "JHGgcz45JKilmzknzelf65ddDadggftIO98P";

const conn = spinalCore.connect(`http://${process.env.SPINAL_USER_ID}:${process.env.SPINAL_PASSWORD}@${process.env.SPINALHUB_IP}:${process.env.SPINALHUB_PORT}/`);

// |
2: Tries load 'List'
spinalCore.load(conn, "List", the hygrometry and temperature of a sensor
function simulate( |
list//3:Ifthe list exists but is empty a first equipment is added
if (list.equipments.length < 1)
addItem(list);
// 4: Else the first equipment is pressed
else
press(list.equipments[0]);
}, function () {
// 5: If 'List'= Math.floor(Math.random() * 100);
const degrees = Math.floor(Math.random() * 30);
sensor.hygrometry.set(hydro);
sensor.temperature.set(degrees);
// Repeats every second
setTimeout(() => {
console.log(sensor.name.get() + ": data has changed");
simulate(sensor);
}, 1000);
};
// Finds a Sensor in the SensorList, if it doesn't exist, |
anemptyfunction getSensorById(list, |
iscreatedanditsfirstequipmentispressedvarlistnew equipmentList();
spinalCore.store(conn, list, "List", function () {
addItem(list);
});
});
// 6: Creates a new equipement and adds it to the list
function addItem(list0; i < list.sensors.length; i++) {
if (list.sensors[i].id.get() === id) {
item = list.sensors[i];
break;
}
}
if (typeof item === "undefined") {
|
constequipmentmodels.SensorModel();
item.id.set( |
0equipment0equipmentssensors.push(item);
}
return |
press()7:Givesrandomvaluestohydrometry and temperature of an equipment
function press(equipment) {
const hydro = Math.floor(Math.random() * 100);
const degrees = Math.floor(Math.random() * 30);
equipment.hydrometry.set(hydro);
equipment.temperature.set(degrees);
// 8: Repeats every second
setTimeout(function ()list is successfully loaded
function onSuccess(list) {
simulate(getSensorById(list, 0));
};
// This function will be called if the list cannot be loaded
function onFailure() {
const list = new models.SensorListModel();
const item = getSensorById(list, 0);
spinalCore.store(conn, list, "List", () => {
|
console.log("equipment 1: has been pressed" press(equipment);
}, 1000spinalCore.load(conn, "List", onSuccess, onFailure);
|
}You can launch your new organ with node. | Code Block |
|---|
| ~/button-system/equipment1$ node index.js |
Go
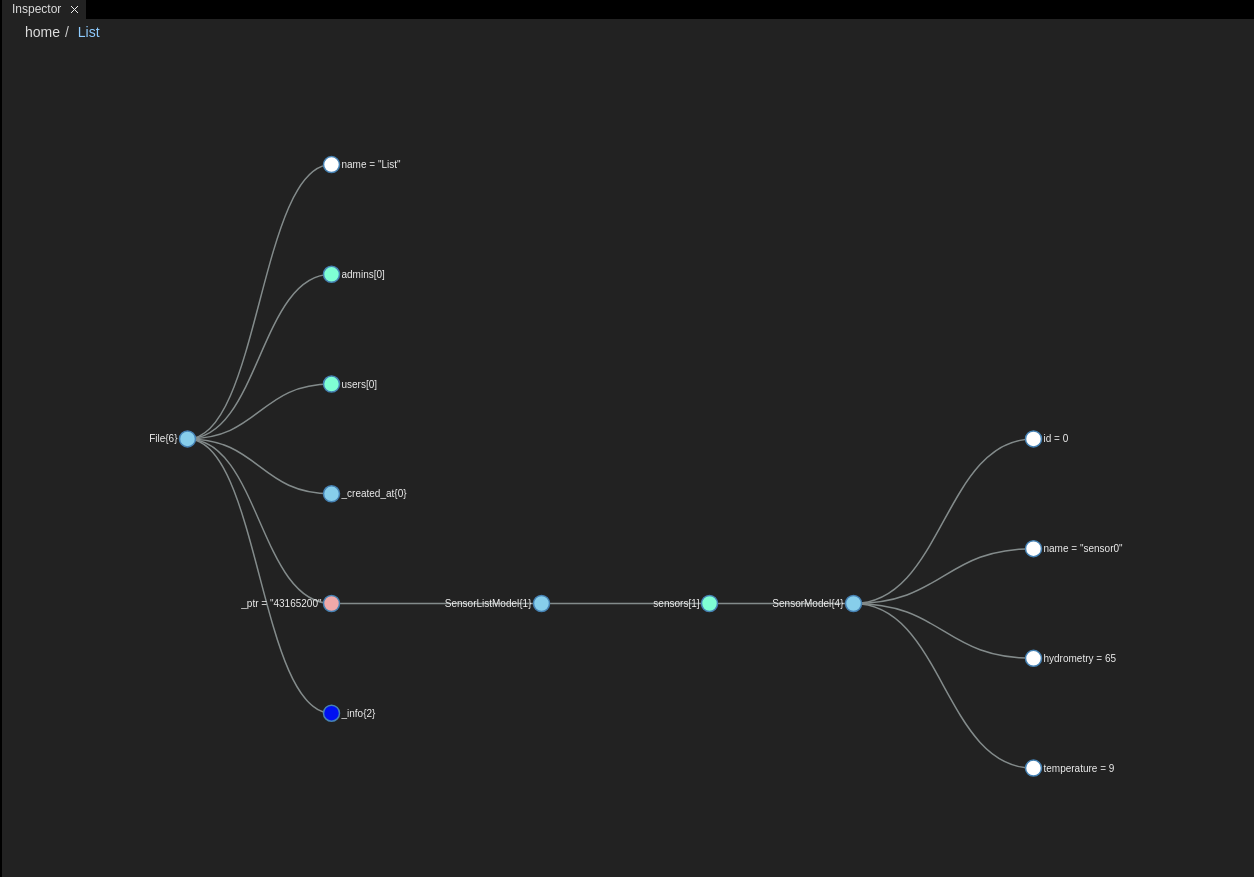
Run spinal-organ-sensor1/index.js and go to the admin UI and put 'List' into the inspector and you should see the hydrometry hygrometry and temperature of equipment0 sensor0 change every second.  Image Removed Image Removed
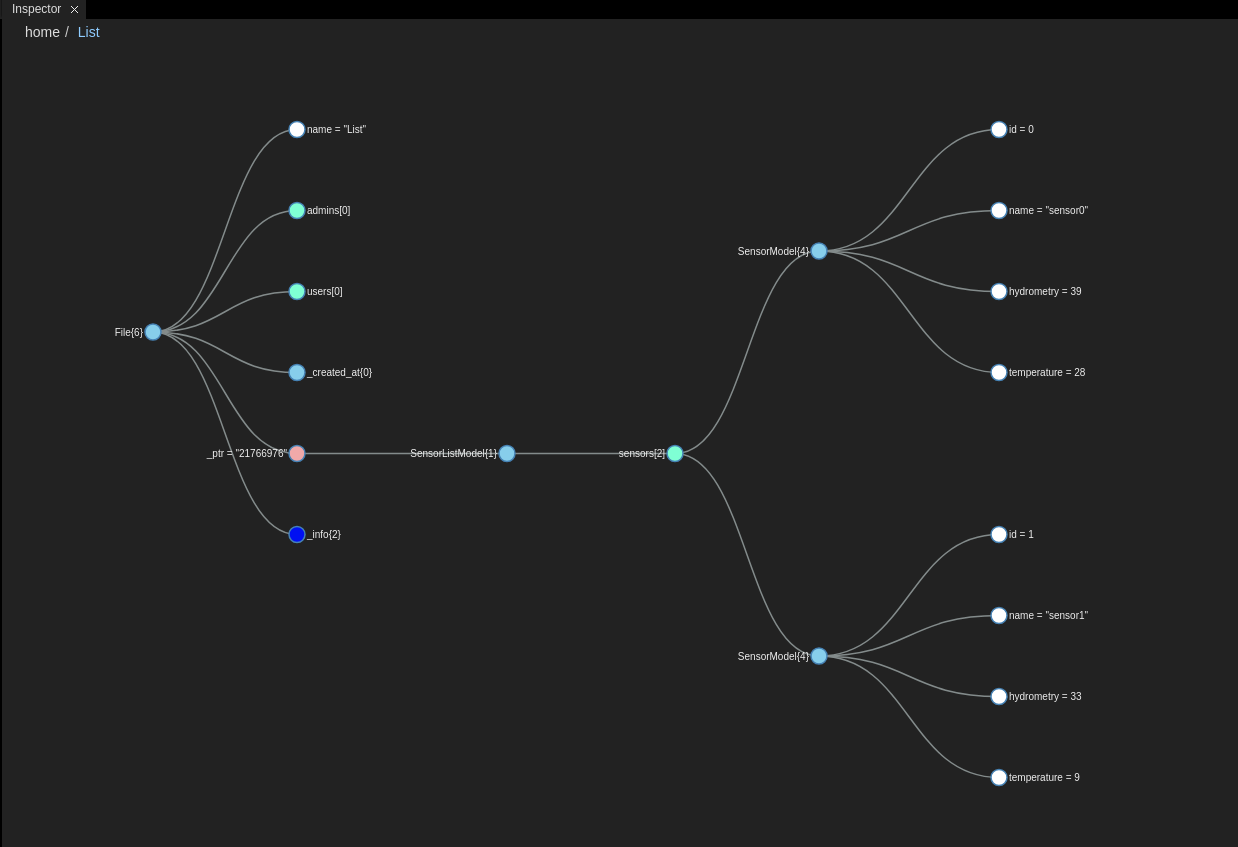
Equipment2Equipment2 will be almost identical to equipment1 so I suggest you start by copying equipment1 Image Added Image Added
Your file spinal-organ-sensor2/index.js should look like this. | Code Block |
|---|
| language | bashjs |
|---|
| theme | DJango |
|---|
| ~/button-system/equipement1$ cd ..
~/button-system$ cp -r equipment1 equipment2
~/button-system$ cd equipment2 |
There are very few changes to make to index.js. equipment2/index.js | Code Block |
|---|
| language | js |
|---|
| theme | DJangotitle | spinal-organ-sensor2/index.js |
|---|
| linenumbers | true |
|---|
| var// Requirements and connection
const spinalCore = require('spinal-core-connectorjs');
const models = require('../spinal-model-buttonmodels/modelmodels.js');
console.log("Configuration Environment not found, using default config");
process.env.SPINALHUB_PORT = 7777;
process.env.SPINALHUB_IP = "127.0.0.1";
process.env.SPINAL_USER_ID = 168;
process.env.SPINAL_PASSWORD = "JHGgcz45JKilmzknzelf65ddDadggftIO98P";
varconst conn = spinalCore.connect(`http://${process.env.SPINAL_USER_ID}:${process.env.SPINAL_PASSWORD}@${process.env.SPINALHUB_IP}:${process.env.SPINALHUB_PORT}/`);
// Gives random values to the hygrometry and temperature of a
var list = new equipmentList();
spinalCore.load(conn, "List", function (list) {
// 1: An item is created if there are less than 2 equipments in the list
if (list.equipments.length < 2)
addItem(list);
// 2: The second item is pressed (instead of the first)
press(list.equipments[1]);
}, function () {
spinalCore.store(conn, list, "List", function () {
addItem(list);
});
});
function addItem(list) {
let item = new equipmentsensor
function simulate(sensor) {
const hydro = Math.floor(Math.random() * 100);
const degrees = Math.floor(Math.random() * 30);
sensor.hygrometry.set(hydro);
sensor.temperature.set(degrees);
// Repeats every second
setTimeout(() => {
console.log(sensor.name.get() + ": data has changed");
simulate(sensor);
}, 1000);
};
// Finds a Sensor in the SensorList, if it doesn't exist, creates it
function getSensorById(list, id) {
let item;
for (let i = 0; i < list.sensors.length; i++) {
if (list.sensors[i].id.get() === id) {
item = list.sensors[i];
break;
}
}
if (typeof item === "undefined") {
item = new models.SensorModel();
item.id.set(0id);
// 3:
The new item is named equipment1 (instead of equipment0)
item.name.set("equipment1sensor" + id);
list.equipmentssensors.push(item);
}
press(return item);
}
// This function press(equipment) {
let hydro = Math.floor(Math.random() * 100);
let degrees = Math.floor(Math.random() * 30);
equipment.hydrometry.set(hydro);
equipment.temperature.set(degrees);
setTimeout(function () {
// 4: This message changes
console.log("equipment 2: has been pressed");
press(equipment will be called if the list is successfully loaded
function onSuccess(list) {
simulate(getSensorById(list, 1));
};
// This function will be called if the list cannot be loaded
function onFailure() {
const list = new models.SensorListModel();
const item = getSensorById(list, 1);
spinalCore.store(conn, list, "List", () => {
simulate(item);
}, 1000);
} |
Now launch equipment2 with node. | Code Block |
|---|
| ~/button-system/equipment2$ node index.js |
If you go back to the inspector you will notice that a new equipment has appeared in the List.  Image Removed Image Removed;
spinalCore.load(conn, "List", onSuccess, onFailure);
|
 Image Added Image Added
|


