SpinalGraph : Create your first Graph

Goal
By following this tutorial, you will able to create a simple SpinalGraph, add equipment in it, and visualize the SpinalGraph ( also call Graph ) in viewer.
System Schema
the schema system is simple, we use Drive UI for create Digital Twin, Admin UI / Viewer UI for visualize the Graph we are going to create and a simplistic organ for initialize all of that thing.

Data Schema
We gonna create a simplistic Graph, with one Building, three Floor and one Equipment in a Room in each Floor.
.jpg?version=1&modificationDate=1542633950624&cacheVersion=1&api=v2&width=800&height=600)
Create and Init project Files
To begin, create the spinal-graph-tuto folder and with the terminal move to this folder and type the commands below.
npm init -y
The commands above allow you to initialize the project , if you check in the project folder, you will notice that there is a package.json file, replace its content with the code below and install the dependencies by typing the command npm install
{
  "name": "spinal-graph-tuto",
  "version": "1.0.0",
  "description": "",
  "main": "index.js",
  "scripts": {
    "test": "echo \"Error: no test specified\" && exit 1"
  },
  "dependencies": {
    "spinal-browser-viewer": "https://github.com/spinalcom/spinal-browser-viewer",
    "spinal-browser-admin": "https://github.com/spinalcom/spinal-browser-admin",
    "spinal-browser-drive": "https://github.com/spinalcom/spinal-browser-drive"
  },
  "keywords": [],
  "author": "",
  "license": "ISC"
}
If you need more details about package, let's see tutorials about it here,
Don't forget to modify .config.json file, we need to add info for the spinal-organ-forge, see here what we need, and start a new BIMObject, download .rtv file and create Digital Twin, we gonna add the Graph to this Digital Twin, so, for better convenience, with the file generated, rename rac_basic_sample_project (file given as an example in the tutorial) it to basic,
Create Graph
now let's create a new folder and init a package.json in it,
mkdir Organ-create-graph && cd Organ-create-graph
npm init -y
In the package.json, add the dependencies :
{
   "name": "dummy-graph-organ",
   "version": "1.0.0",
   "description": "",
   "main": "index.js",
   "scripts": {
      "test": "echo \"Error: no test specified\" && exit 1"
   },
   "keywords": [],
   "author": "",
   "license": "ISC",
   "dependencies": {
    "spinal-lib-forgefile": "git+https://github.com/spinalcom/spinal-lib-forgefile.git",
    "spinal-core-connectorjs": "git+https://github.com/spinalcom/spinal-core-connectorjs.git",
    "spinal-model-graph": "git+https://github.com/spinalcom/spinal-model-graph.git"
  }
}
Install with npm install install command
Configuration
Create a file named config.js and write this in it
module.exports = {
  spinalConnector: {
    user: 168,
    password: 'JHGgcz45JKilmzknzelf65ddDadggftIO98P',
    host: 'localhost',
    port: 7777,
    protocol: 'http'
  },
  file: {
    path: '/__users__/admin/basic'
  }
};
You can see common info about SpinalConnector, and the file info store the path of your new Digital Twin previously created and renamed
Now let's create file and function to create graph and store this in a Digital Twin basic in a new index.js
var spinalCore = require('spinal-core-connectorjs');
var forgeFile = require('spinal-lib-forgefile');
var config = require('./config');

var spinalgraph = require('spinal-model-graph');

const connect_opt =
  `http://${config.spinalConnector.user}:${config.spinalConnector.password}@${
    config.spinalConnector.host}:${config.spinalConnector.port}/`;

var conn = spinalCore.connect(connect_opt);

/**
 * This function create a context VirtualNetwork if don't exist, get it if exist
 * and return it;
 */
let createOrGetContext = function(_graph) {
  return new Promise((resolve, reject) => {
    _graph.getContext("DummyContext").then(async context => {
      if (typeof context !== "undefined") {
        return resolve(context);
      }

      let dummy = new spinalgraph.SpinalContext(
        "DummyContext",
        "DummyContext",
      );

      try {
        _graph.addContext(dummy);
        dummy = await _graph.getContext("DummyContext");
        resolve(dummy);
      } catch (e) {
        reject(e);
      }
    });
  });
};

/**
 * This function create a graph if don't exist, get it if exist and return it;
 */
let getGraph = _file => {
  return new Promise(function(resolve) {
    if (typeof _file.graph != 'undefined') return resolve(_file.graph);

    var _graph = new spinalgraph.SpinalGraph();
    _file.add_attr({
      graph: _graph
    });
    resolve(_graph);
  });
};

let getFileAnCreateNetwork = (_file) => {
  getGraph(_file).then(_graph => {
    buildDummy(_graph);
  });
};

/**
 * This function fill your graph with custom node, room, floor, equipment...
 */
let buildDummy = async function(_graph) {
  let context = await createOrGetContext(_graph);
  let promises = [];
  promises.push(context.addChildInContext(new Model(), 'HasFloor'));
  promises.push(context.addChildInContext(new Model(), 'HasFloor'));
  promises.push(context.addChildInContext(new Model(), 'HasFloor'));
  await Promise.all(promises);

  const children = await context.getChildren();
  promises = [];
  for (let i = 0; i < children.length; i++) {
    children[i].info.name.set('Floor' + i);
    const room = new spinalgraph.SpinalNode('Room' + i);
    const equipment = new spinalgraph.SpinalNode('Equipment' + i);
    equipment.info.add_attr({
      status: true
    });
    promises.push(room.addChildInContext(
      equipment, 'HasEquipment', spinalgraph.SPINAL_RELATION_TYPE,
      context));
    promises.push(children[i].addChildInContext(
      room, 'HasRoom', spinalgraph.SPINAL_RELATION_TYPE, context));
  }
  return Promise.all(promises);
};


// LoadFile, you already know this function, it's explain in first tutorial
spinalCore.load(conn, config.file.path, getFileAnCreateNetwork, () => {
  const _file = new forgeFile.ForgeFileItem();
  spinalCore.store(
    conn, _file, config.file.path, getFileAnCreateNetwork.bind(this,
      _file)
  );
});
The first part of this file is already know if you are done the basic tutorial
getGraph return the Graph if it exist, or create it
createOrGetContext get the graph and return a Context, or create it
buildDummy fill your graph with 3 Floor, in each Floor he creates one Room, and in each Room one Equipment
getFileAnCreateNetwork call function above and create ForgeFileItem, Graph or Context if they do not exist
We can notice we are set status attribut, in each equipment.
More details about SpinalGraph Method
You can easily found more details in a API section, /wiki/spaces/DOC/pages/174260318
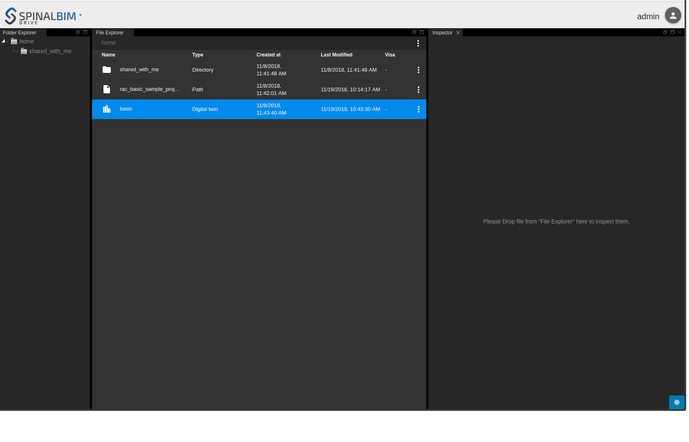
Visualize the graph
to visualize the graph, open the view at http://localhost:7777/html/drive#!/home
In this tutorial we have bind the graph to the ForgeFileItem, so drag and drop the Digital Twin previously created (and renamed basic) to your inspector
Conclusion
In this short tutorial you see how to create a basic graph with context, bind this to your ForgeFileItem, and some floor, room or equipment and visualize it in viewer.