| Panel | ||||||
|---|---|---|---|---|---|---|
| ||||||
In this tutorial you will be introduced to new browser organ with an user interface: the drive and the viewer. System architecture: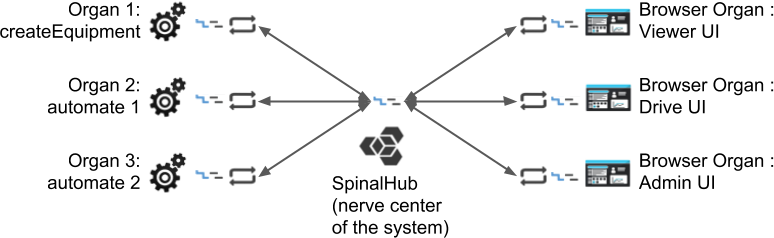 |
| Panel | |||||||||||||
|---|---|---|---|---|---|---|---|---|---|---|---|---|---|
| |||||||||||||
A. InstallationFirst we need to the Spinalcom Drive:
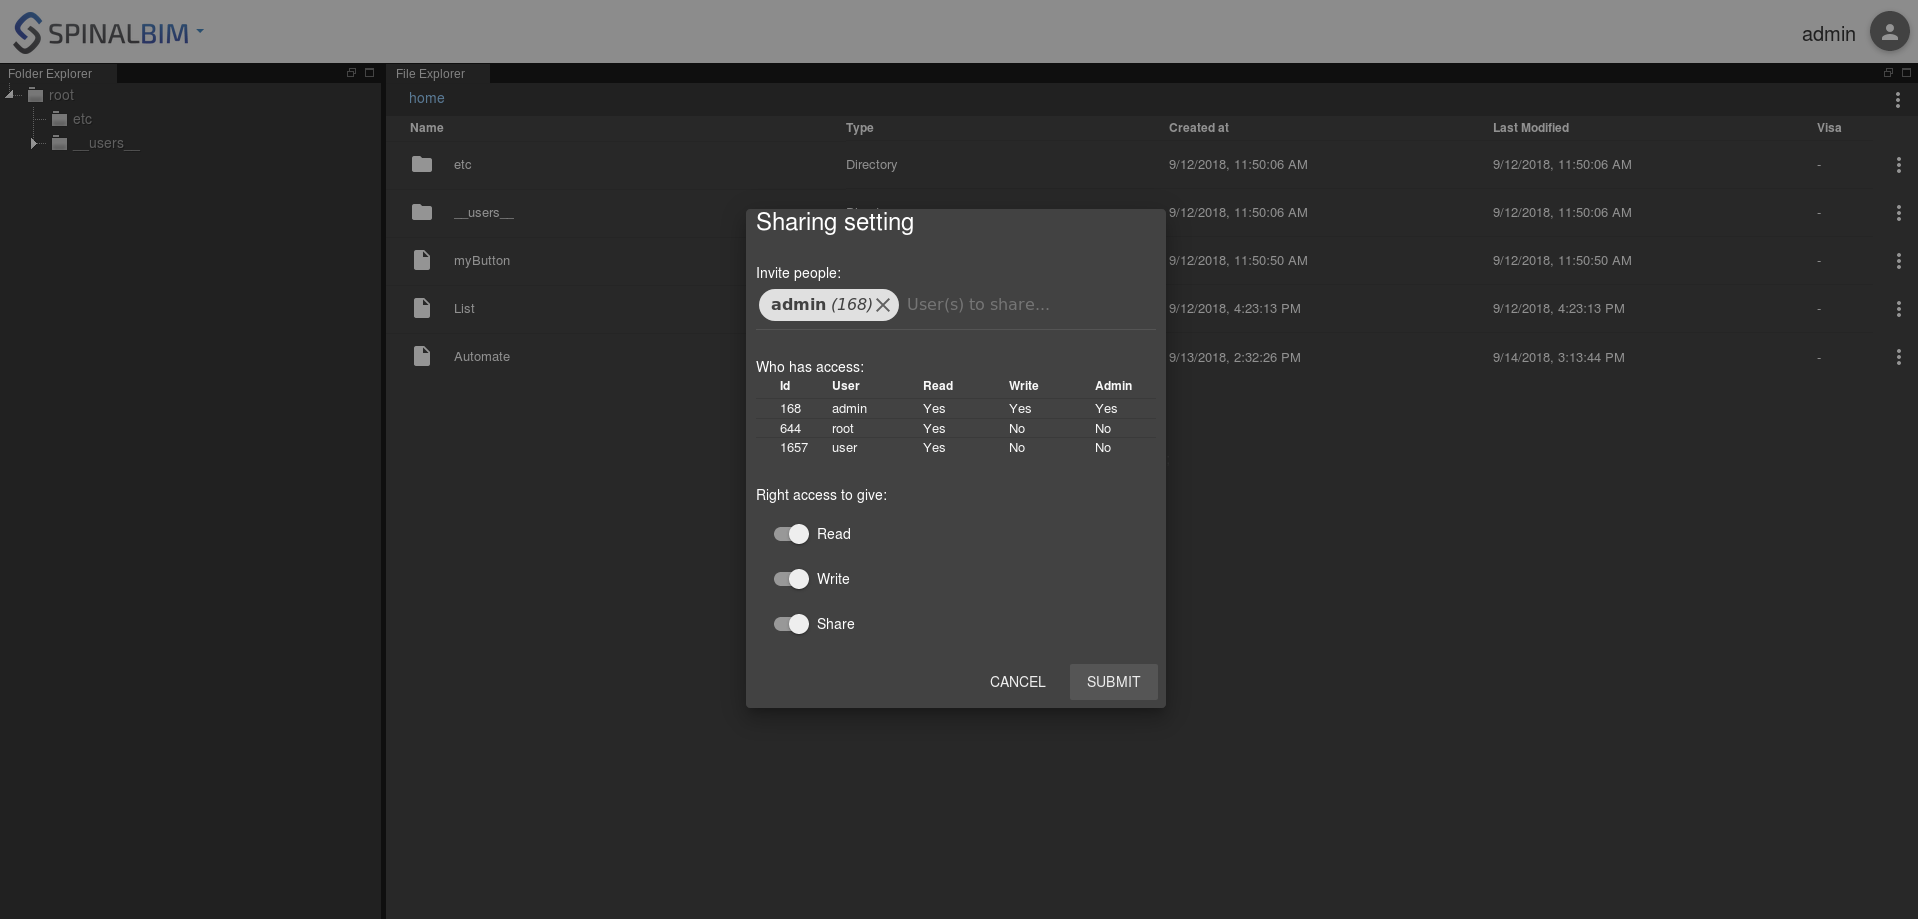
B. Share Automate to driveWe're going to share Automate to drive to allow drive to use it. First right click on automate and choose share. 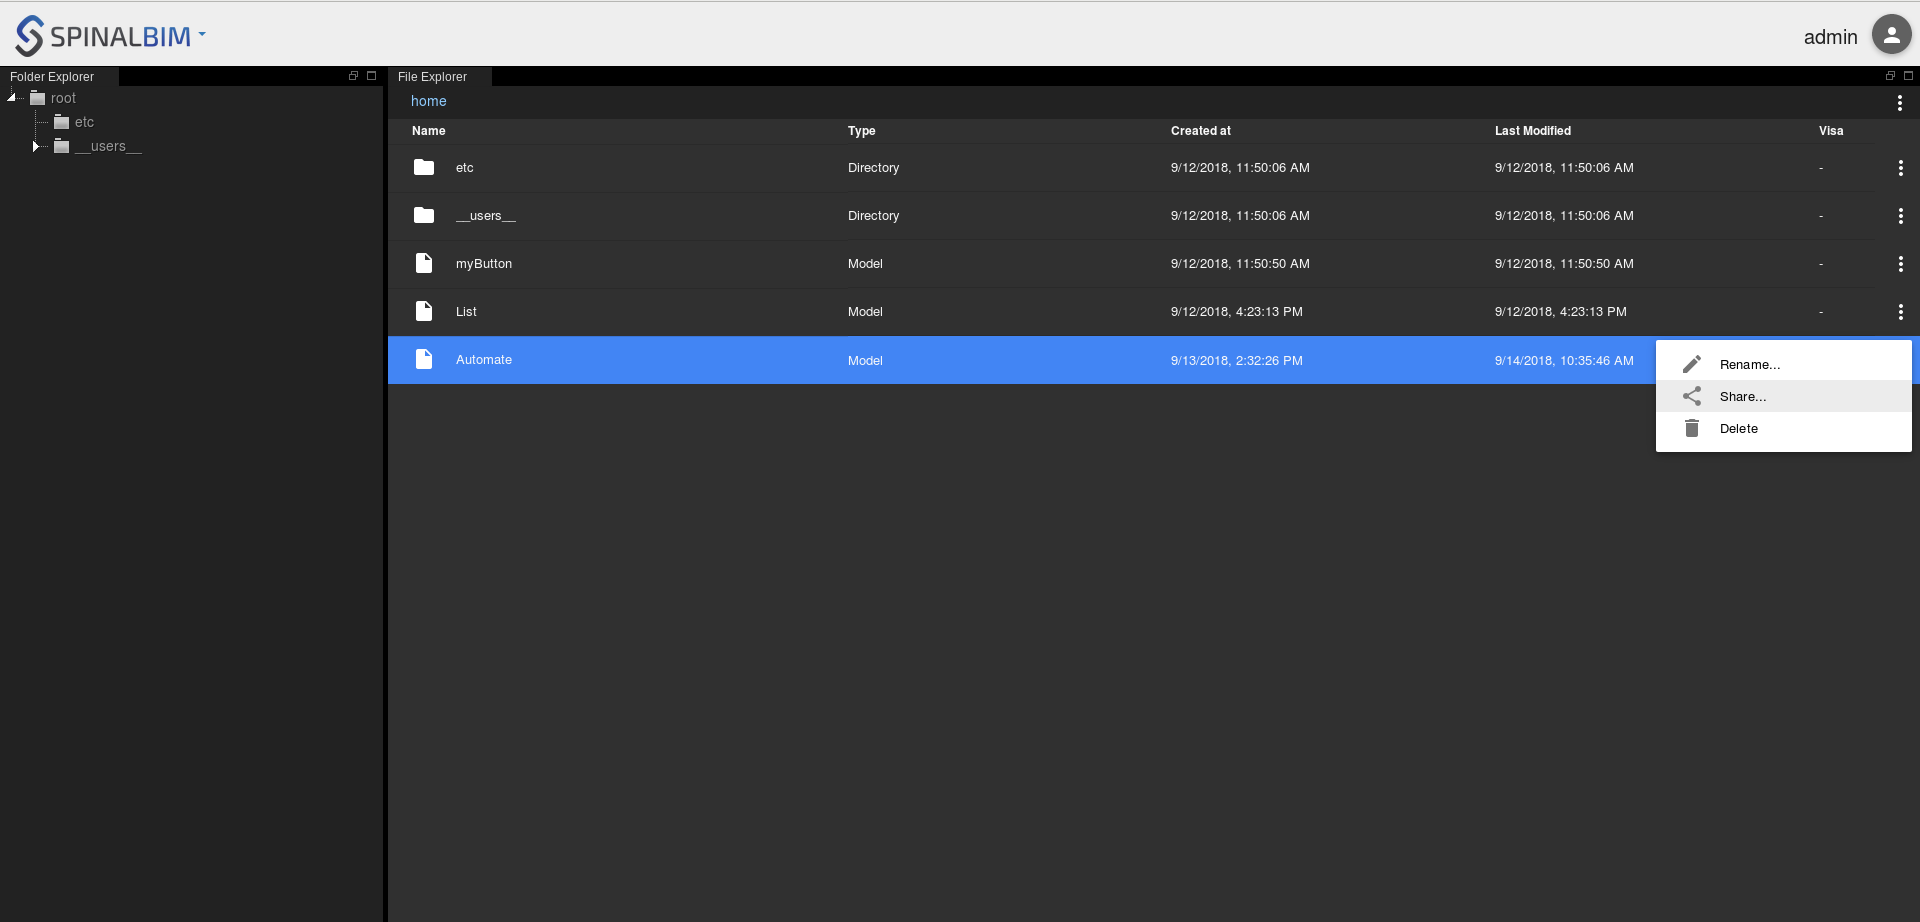 Then give read, write and share rights to admin in the menu that appeared.
To access the drive just change the url to http://localhost:7777/html/drive. Go in the folder "shared_with_me" and you should see Automate. C. Get a rvt fileFor the rest of the tutorial we will need a rvt file. Here is where you can get one: Now we need to drop it in the drive, to do that open your file manager and drag and drop the rvt file onto the drive.  |
| Panel | ||||||
|---|---|---|---|---|---|---|
| ||||||
link utilities: install/conf viewer create digital twin try viewerDiscover the viewer in this utility: Viewer. |
| Panel | |||||||||||||||||||||||||||||||||||||||||||||||
|---|---|---|---|---|---|---|---|---|---|---|---|---|---|---|---|---|---|---|---|---|---|---|---|---|---|---|---|---|---|---|---|---|---|---|---|---|---|---|---|---|---|---|---|---|---|---|---|
| |||||||||||||||||||||||||||||||||||||||||||||||
Download plugin, rename:
edit package.json:
install
edit .config.env/viewer.json
config viewer:
reload spinal viewer => plugin should appear |
| Panel | |||||||||||||||
|---|---|---|---|---|---|---|---|---|---|---|---|---|---|---|---|
| |||||||||||||||
Load list in mounted, display list in template, create .container in style: spinal-env-viewer-plugin-sample/testExtention.vue
show how it should look |