Get your Automate in the viewer
- Waiss Baqui
- florin cuzeac (Unlicensed)
- Vincent Delassus (Unlicensed)

In this tutorial we will introduce the "browser organ" with a user interface: the drive and the viewer.
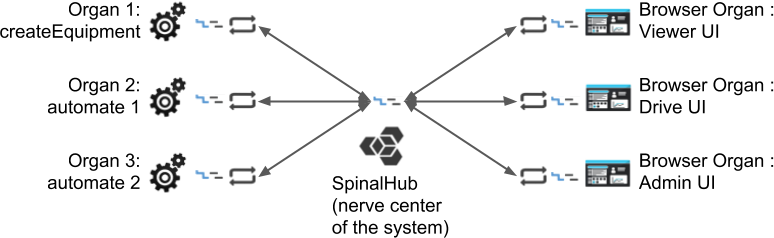
System architecture:
For this tutorial you must have done the Basic Automate Tutorial
A. Installation
First we need to install the Spinalcom Drive :
~/equipment-system$ npm i -s https://github.com/spinalcom/spinal-browser-drive
B. Share the Automate file
We're going to share the file "Automate" so, as a standard user, you can access your data in your drive.
First right click on the file "Automate" and choose share.
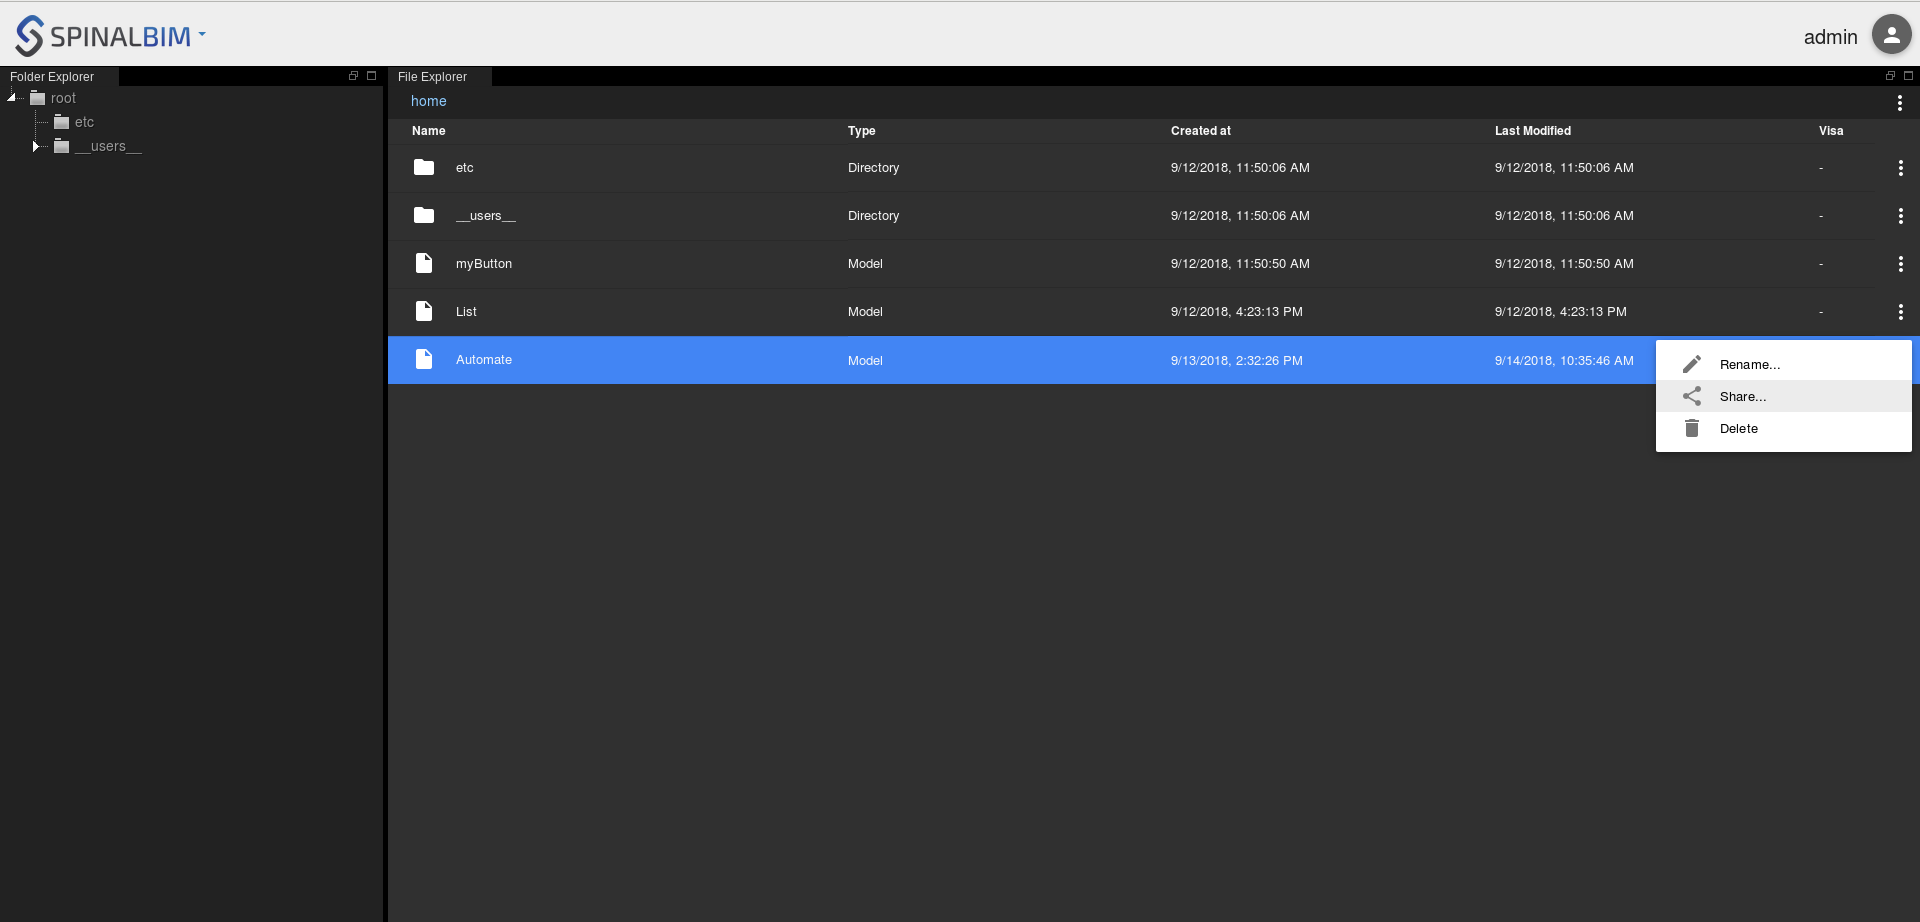
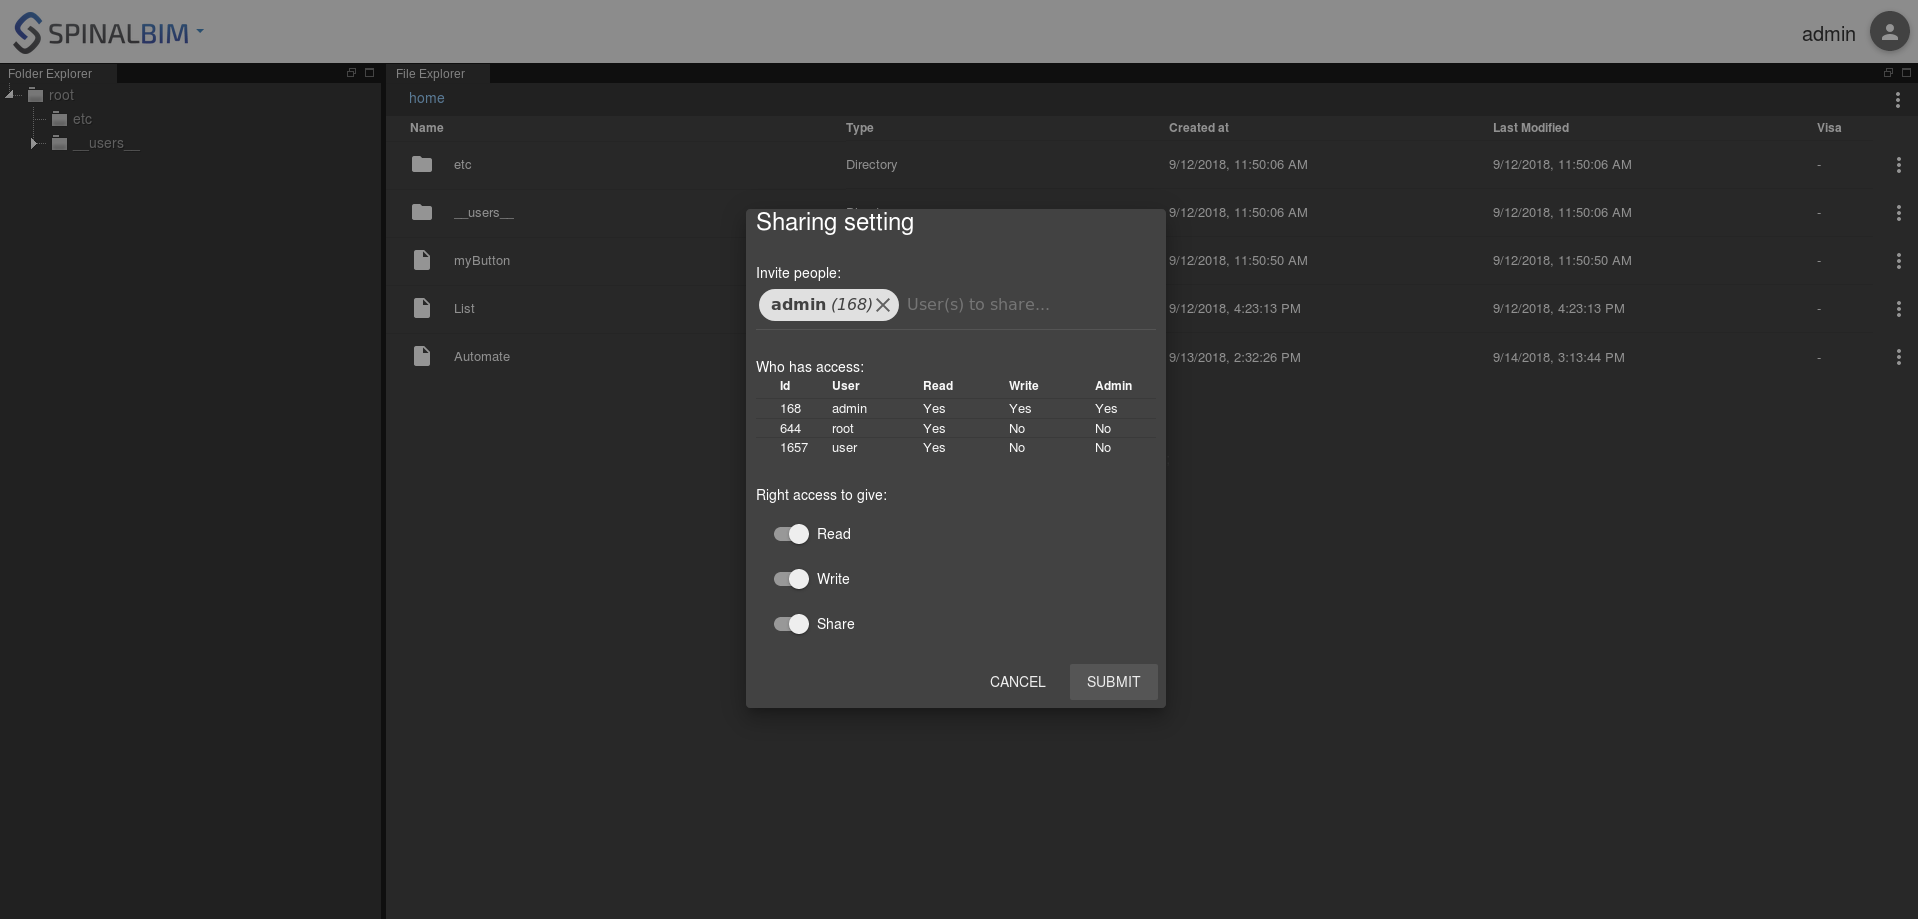
Then give read, write and share rights to admin in the menu that appeared.
To access the drive just change the url to http://localhost:7777/html/drive
Go in the folder "shared_with_me" and you should see the file Automate.
Now we will install the Spinal Viewer.
You can have more informations to how to setup the Autodesk Forge account and import a 3D file (rvt, ifc, etc...) in our drive here.
$ npm install -s https://github.com/spinalcom/spinal-browser-viewer
Now that you've seen the basics, let's try to install a plugin. Download and rename this example:
~/button-system$ git clone https://gist.github.com/Diclah/2887ee1bcf1353d9615a1dcf4c6a0128
~/button-system$ mv 2887ee1bcf1353d9615a1dcf4c6a0128 spinal-env-viewer-plugin-sample
Don't forget to rename it in its package.json.
spinal-env-viewer-plugin-sample/package.json
"name": "spinal-env-viewer-plugin-sample",
Now install it:
~/button-system$ npm i -s spinal-env-viewer-plugin-sample
Edit or create .config_env/viewer.json and add your new plugin to the list of viewer plugins.
.config_env/viewer.json
{
  "spinal-env-viewer-plugin-sample": "1.0.0"
}
Now use create_viewer_env binary to configure the viewer.
~/button-system$ ./node_modules/.bin/create_viewer_env
Reload the spinal viewer and the plugin should appear in the form of a button.
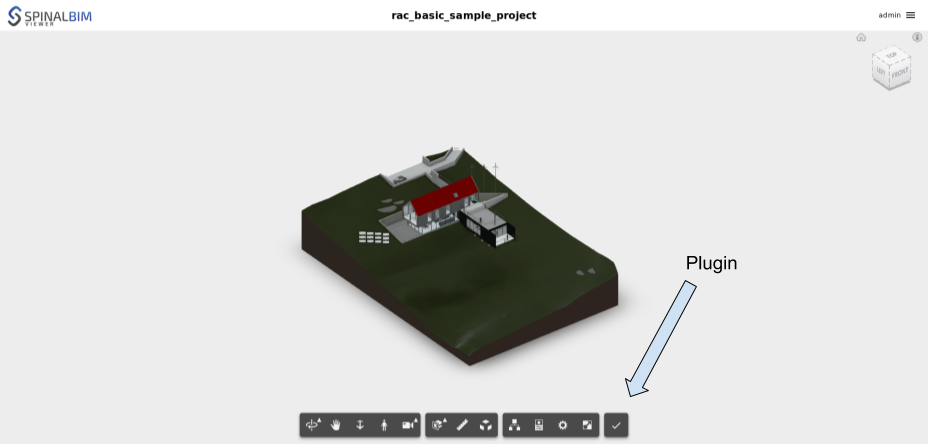
Once you press it a small window will appear.
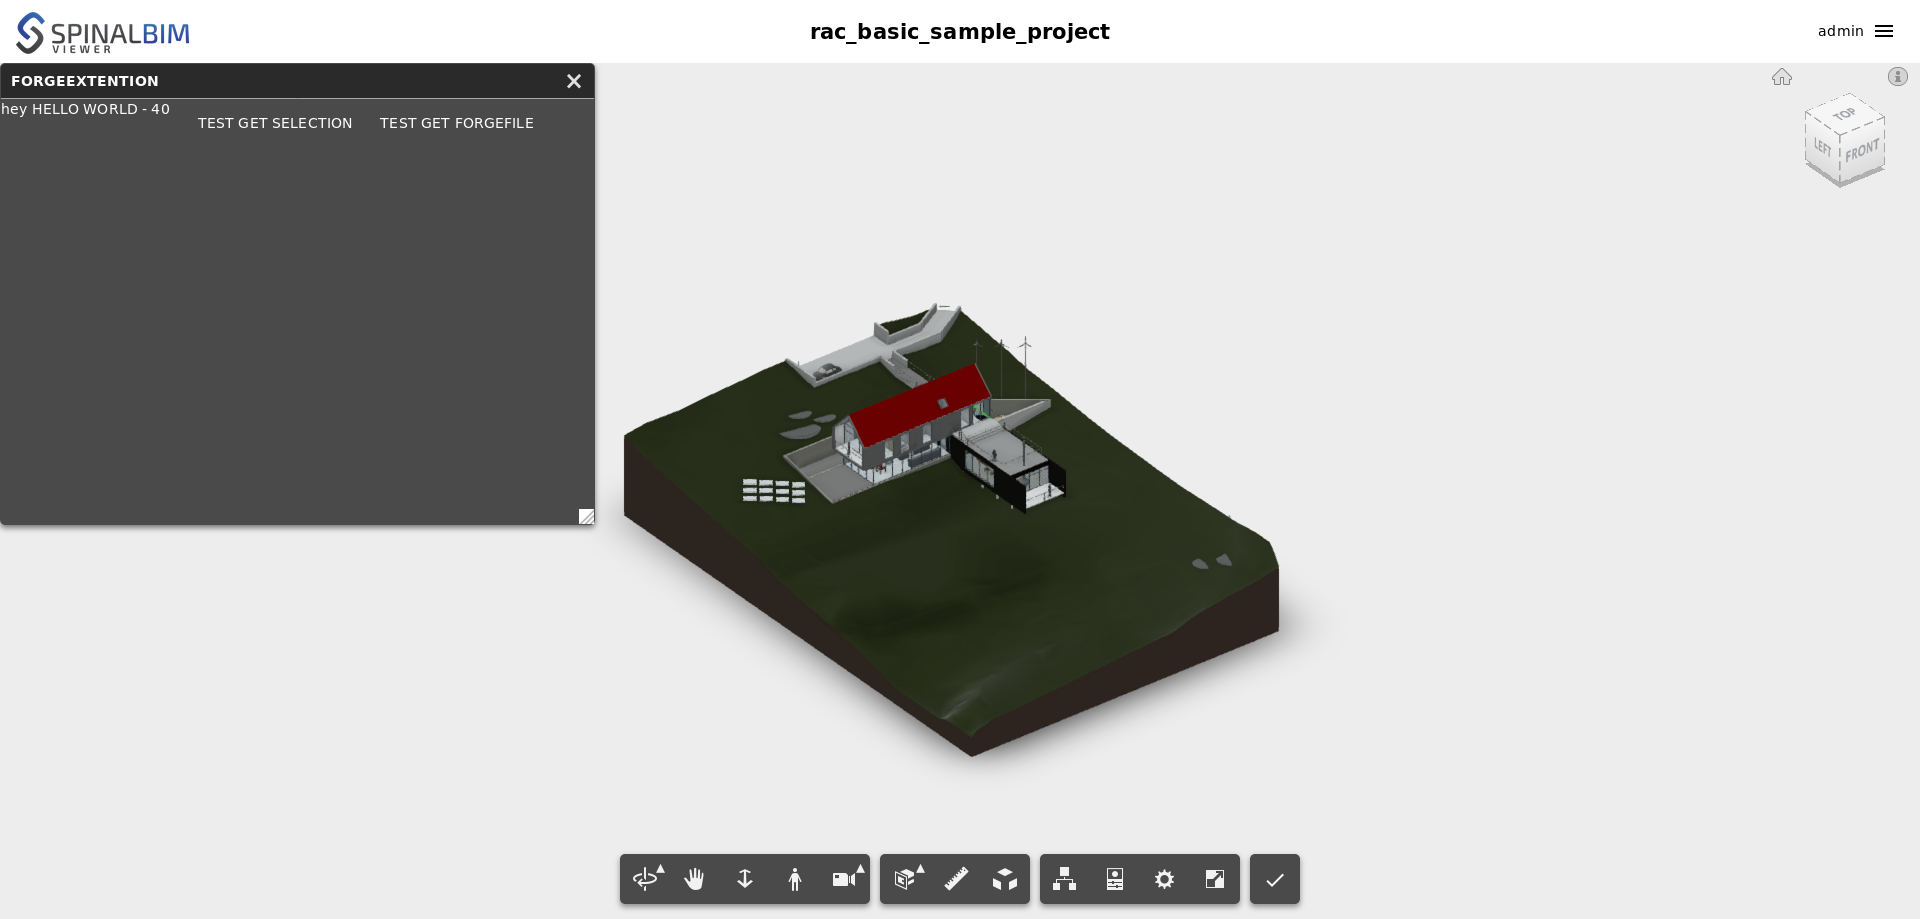
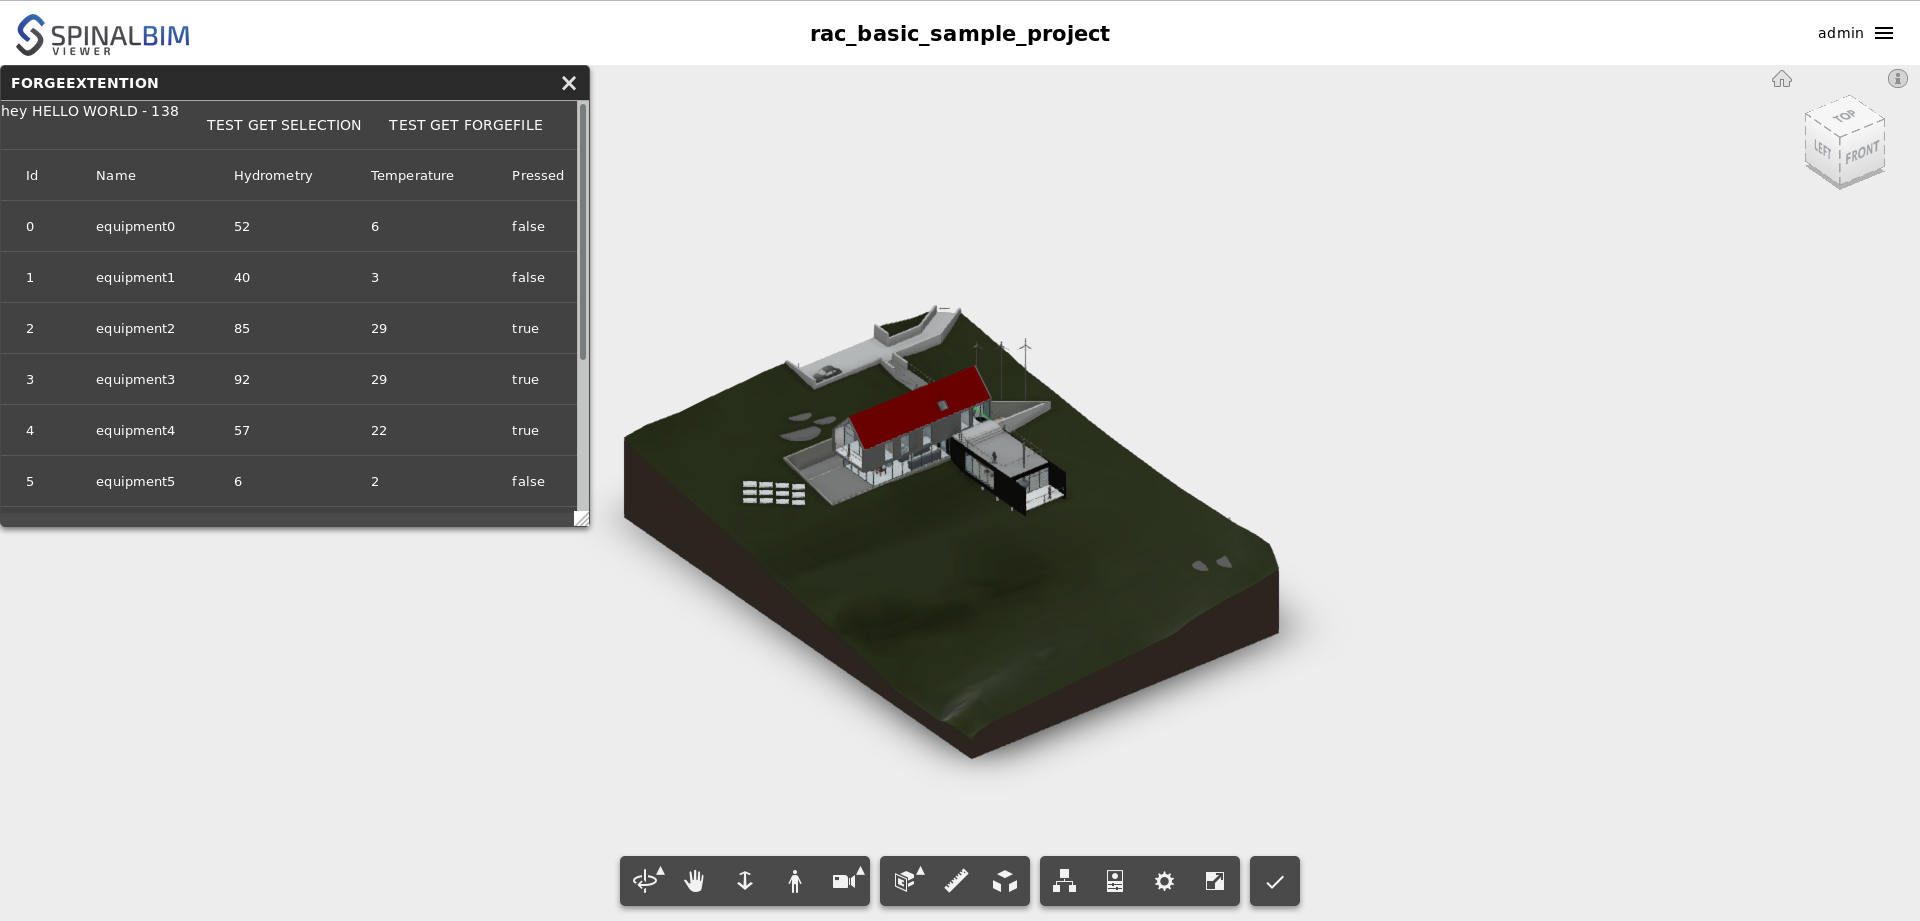
This first plugin isn't really impressive, let's improve it. We're going to make it display the equipments from our Automate list.
To modify it, go to spinal-env-viewer-plugin-sample.
spinal-env-viewer-plugin-sample/testExtention.vue
<template>
<!-- 1: Add an md-element -->
  <md-content class="container md-scrollbar">
    <div>
      hey {{testHello}} - {{count}}
      <md-button @click="getSelection">
        TEST GET SELECTION
      </md-button>
      <md-button @click="logForgeFile">
        TEST GET ForgeFile
      </md-button>
    </div>
<!-- 2: Display the id, name, hydrometry, temperature and state of all equipments in the list -->
    <md-table>
      <md-table-row>
        <md-table-cell>Id</md-table-cell>
        <md-table-cell>Name</md-table-cell>
        <md-table-cell>Hygrometry</md-table-cell>
        <md-table-cell>Temperature</md-table-cell>
     </md-table-row>
      <md-table-row v-for="item in this.list"
                    :key="item._server_id">
        <md-table-cell>{{item.id.get()}}</md-table-cell>
        <md-table-cell>{{item.name.get()}}</md-table-cell>
        <md-table-cell>{{item.hygrometry.get()}}</md-table-cell>
        <md-table-cell>{{item.temperature.get()}}</md-table-cell>
      </md-table-row>
    </md-table>
  </md-content>
</template>

<script>
function loop(func) {
  func();
  setTimeout(() => {
    loop(func);
  }, 1000);
}

// 3: Load Automate from the drive and fill the list with its elements
function loadList() {
  this.spinalSystem.load("/__users__/admin/shared_with_me/Automate").then(
    automate => {
      this.equip = automate.sensors;
      for (let i = 0; i < automate.sensors.length; i++) {
        this.list.push(automate.sensors[i]);
      }
    },
    () => {
      console.log("error: could not load Automate");
    }
  );
}

export default {
  name: "testExtention",

  data() {
	this.spinalSystem;
	this.viewer;
    this.equip;
    return {
      testHello: "HELLO WORLD",
      count: 0,
// 4: The list array which will contain the equipments
      list: []
    };
  },
  methods: {
    getSelection: function() {
      let selection = this.viewer.getSelection();
      console.log(selection);
    },
    logForgeFile: function() {
      this.spinalSystem.getModel().then(forgefile => {
        console.log(forgefile);
      });
    }
  },
  created() {
    this.spinalSystem = window.spinal.spinalSystem;
    this.viewer = window.spinal.ForgeViewer.viewer;
  },
  mounted() {
// 5: Call to loadList
	loadList.call(this);

    let vm = this;
    loop(() => {
      vm.count += 1;
    });
  }
};
</script>

<style>
/* 6: Create the container style */
.container {
  height: calc(100% - 48px);
  overflow-y: auto;
  box-sizing: border-box;
}
</style>
Don't forget to execute ./node_modules/.bin/create_viewer_env and to reload spinal-env-viewer-plugin-sample or your changes won't show.
Conclusion
In this tutorial you learned:
- how to use the spinal drive
- how to use the spinal viewer
- how to install and modify your spinal viewer plugin
This tutorial will be continued in /wiki/spaces/DOC/pages/42926106.