Table of contents
- Goal
- Creating a new spinal System
- Create a data model
- Create virtualButton organ
- Launch the system and monitor the results
- Create our second organ : virtualButtonMonitor
Quick navigation
| Child pages (Children Display) | ||||
|---|---|---|---|---|
|
| title | Goal |
|---|
Description du systeme
We will create a simple IoT system that will alert us through a nice web interface whenever the temperature at our wine cellar is not between 10°C and 16°C. We will call this system FineWine.
This system, based on our understanding of intelligent micro-system, is composed of the following organs:
Nerve center: where the hub and its data are located.
Admin dashboard: the administration interface of your hub.
VirtualTemperatureSensor organ: simulate the temperature sensor of the wine cellar continuously and synchronize the samples with the hub.
Analytics organ: analyzes the temperature and alerts if the temperature is ok or not.
Monitoring interface organ: a web interface, displaying the current status of our wine cellar.
| title | Creating a new Spinal System |
|---|
Install spinal-system-basic
The first step is to create the directory where the project will be stored. We will call it fine-wine-system. Then, install inside the “spinal-system-basic” template. We suggest that before running the following command you initialize an npm project (with npm init):
| language | bash |
|---|---|
| theme | DJango |
| Panel | ||||||
|---|---|---|---|---|---|---|
| ||||||
The goal of this tutorial is to initiate you to the Spinalcom Viewer and how to install it. |
| Panel | |||||||||||||
|---|---|---|---|---|---|---|---|---|---|---|---|---|---|
| |||||||||||||
To follow this tutorial, some installations are required. Before installing the Spinal Viewer, you need to install Spinalcom Drive. By the way, you can follow this tutorial if you don't know how to. Once this is done you can install the viewer in the same folder you installed the drive.
|
| Panel | ||||||
|---|---|---|---|---|---|---|
| ||||||
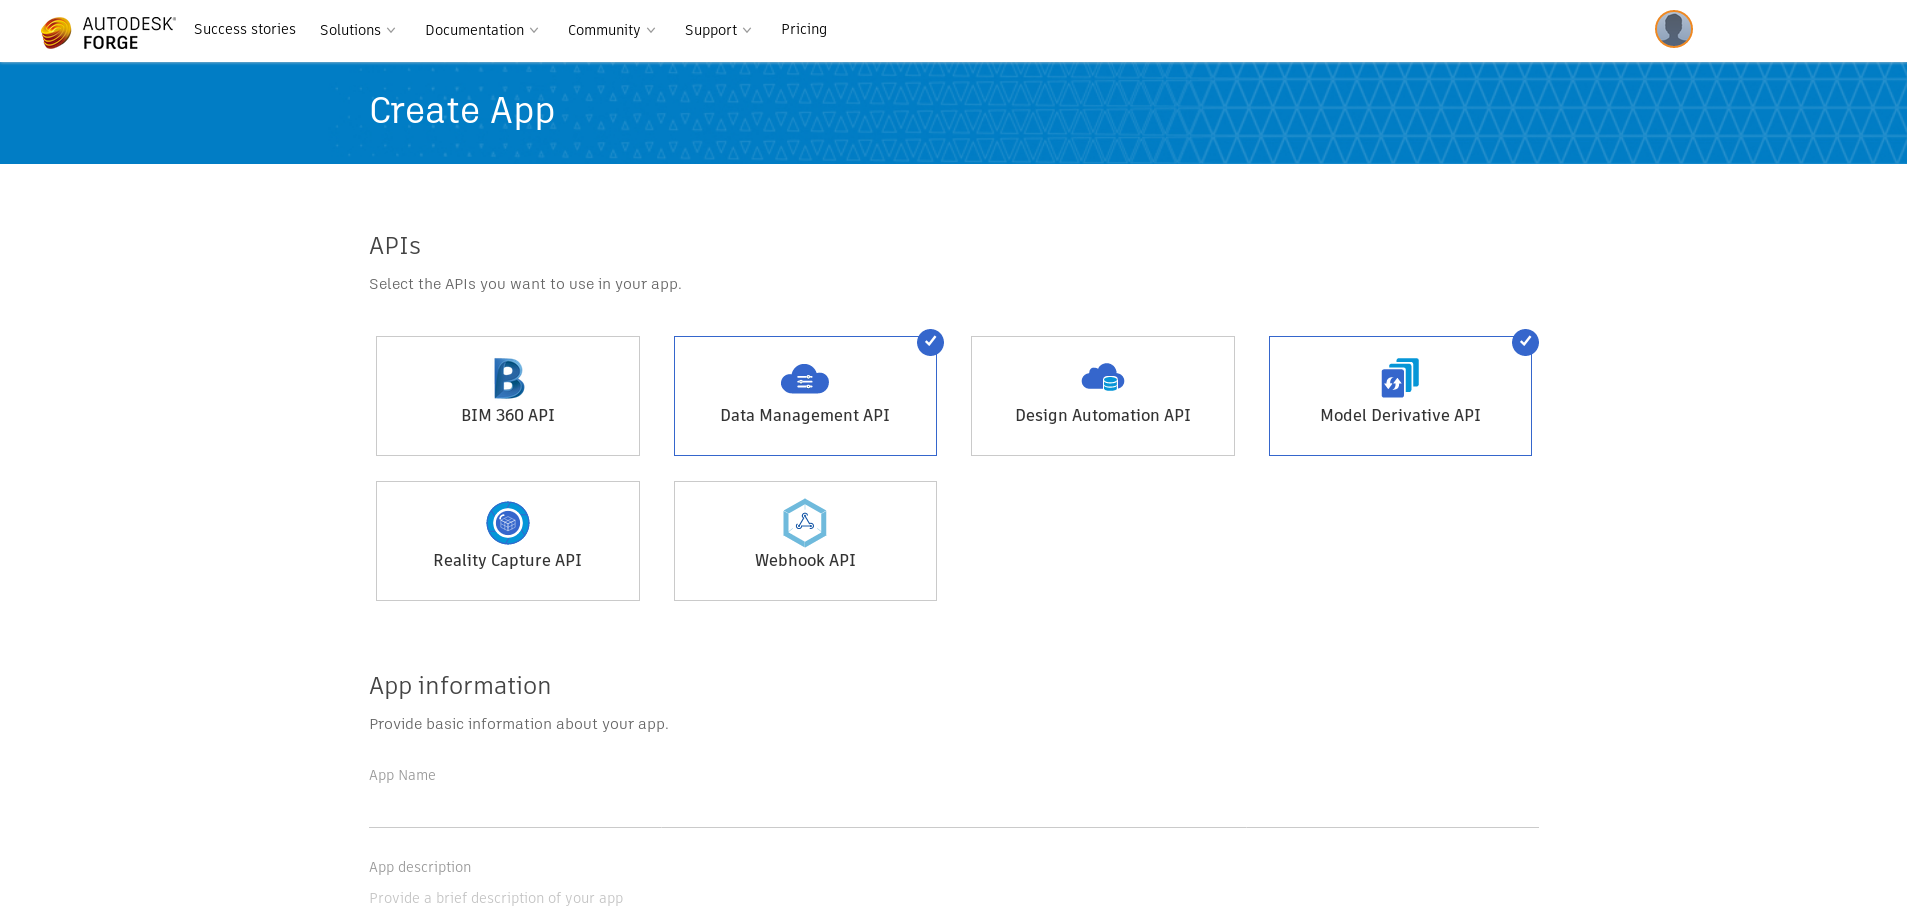
To use the viewer you're going to need an Autodesk Forge account. Create or log in: https://developer.autodesk.com/ Create an App with at least the Data Management API and Model Derivative API. The other labels don't matter. https://forge.autodesk.com/myapps/create |
After you created the app you will be given a client ID and a client secret in the app's information.
Put these information in .config.json in the environment of spinal-organ-forge.
.config.json
| Code Block | ||||||
|---|---|---|---|---|---|---|
| ||||||
{
  "spinal-core-hub": {
    "env": {
      "SPINAL_USER_ID": "168",
      "SPINALHUB_PORT": 7777,
      "SPINALHUB_IP": "127.0.0.1",
      "SPINAL_PASSWORD": "JHGgcz45JKilmzknzelf65ddDadggftIO98P",
      "SPINAL_PASSWORD_ROOT": "4YCSeYUzsDG8XSrjqXgkDPrdmJ3fQqHs",
      "SPINAL_PASSWORD_USER": "LQv2nm9G2rqMerk23Tav2ufeuRM2K5RG"
    },
    "env_test": {
      "SPINAL_USER_ID": "168",
      "SPINALHUB_PORT": 7777,
      "SPINALHUB_IP": "127.0.0.1",
      "SPINAL_PASSWORD": "JHGgcz45JKilmzknzelf65ddDadggftIO98P",
      "SPINAL_PASSWORD_ROOT": "4YCSeYUzsDG8XSrjqXgkDPrdmJ3fQqHs",
      "SPINAL_PASSWORD_USER": "LQv2nm9G2rqMerk23Tav2ufeuRM2K5RG"
    },
    "env_production": {
      "SPINAL_USER_ID": "168",
      "SPINALHUB_PORT": 7777,
      "SPINALHUB_IP": "127.0.0.1",
      "SPINAL_PASSWORD": "JHGgcz45JKilmzknzelf65ddDadggftIO98P",
      "SPINAL_PASSWORD_ROOT": "4YCSeYUzsDG8XSrjqXgkDPrdmJ3fQqHs",
      "SPINAL_PASSWORD_USER": "LQv2nm9G2rqMerk23Tav2ufeuRM2K5RG"
    }
  },
  "spinal-organ-forge": {
    "env": {
      "INTERVAL": 2000,
      "CLIENT_ID": "REPLACE_HERE",
      "CLIENT_SECRET": "REPLACE_HERE"
    },
    "env_test": {
      "INTERVAL": 2000,
      "CLIENT_ID": "REPLACE_HERE",
      "CLIENT_SECRET": "REPLACE_HERE"
    },
    "env_production": {
      "INTERVAL": 2000,
      "CLIENT_ID": "REPLACE_HERE",
      "CLIENT_SECRET": "REPLACE_HERE"
    }
  }
}
|
Once is done, we need to add some packages to our file package.json.
First of all delete the package-lock.json file and add the following dependencies to the file :
package.json
| Code Block | ||||||
|---|---|---|---|---|---|---|
| ||||||
{
  "name": "button-system",
  "version": "1.0.0",
  "description": "",
  "main": "index.js",
  "scripts": {
    "test": "echo \"Error: no test specified\" && exit 1"
  },
  "keywords": [],
  "author": "",
  "license": "ISC",
  "dependencies": {
    "spinal-browser-admin": "git+https://github.com/spinalcom/spinal-browser-admin.git",
    "spinal-browser-drive": "git+https://github.com/spinalcom/spinal-browser-drive.git",
    "spinal-browser-viewer": "git+https://github.com/spinalcom/spinal-browser-viewer.git",
    "spinal-env-admin-panel-user-manager": "git+https://github.com/spinalcom/spinal-env-admin-panel-user-manager.git#v2.0.0",
    "spinal-env-drive-plugin-base": "git+https://github.com/spinalcom/spinal-env-drive-plugin-base.git",
    "spinal-env-drive-plugin-digital_twin": "git+https://github.com/spinalcom/spinal-env-drive-plugin-digital_twin.git",
    "spinal-env-drive-plugin-sync-file": "git+https://github.com/spinalcom/spinal-env-drive-plugin-sync-file.git",
    "spinal-env-drive-plugin-version_manager": "git+https://github.com/spinalcom/spinal-env-drive-plugin-version_manager.git",
    "spinal-env-viewer-plugin-forge": "git+https://github.com/spinalcom/spinal-env-viewer-plugin-forge.git",
    "spinal-env-viewer-plugin-graph-manager": "git+https://github.com/spinalcom/spinal-env-viewer-plugin-graph-manager.git",
    "spinal-env-viewer-graph-service": "git+https://github.com/spinalcom/Spinal-Graph-Service.git",
    "spinal-env-viewer-plugin-scene": "git+https://github.com/spinalcom/spinal-env-viewer-plugin-scene.git",
    "spinal-env-viewer-plugin-version": "https://github.com/spinalcom/spinal-env-viewer-plugin-version"
  },
  "devDependencies": {
    "babel-plugin-transform-runtime": "^6.23.0"
  }
} |
Now go to .config_env folder and here you have the following files :
- admin.json
- drive.json
- viewer.json
- user_role_manager.json
In order to launch the Viewer, you need to modify these files like this :
./.config_env/admin.json
| Code Block | ||||||
|---|---|---|---|---|---|---|
| ||||||
{
  "spinal-env-admin-access-rights-manager": "1.0.1",
  "spinal-env-admin-panel-hub-status": "1.0.1",
  "spinal-env-admin-panel-user-manager": "1.0.2",
  "spinal-env-drive-core": "1.0.2",
  "spinal-env-drive-plugin-base": "2.0.0"
} |
./.config_env/drive.json
| Code Block | ||||||
|---|---|---|---|---|---|---|
| ||||||
{
  "spinal-env-drive-core": "1.0.2",
  "spinal-env-drive-plugin-forge": "1.0.7",
  "spinal-env-drive-plugin-forge_viewer": "1.0.1",
  "spinal-env-drive-plugin-base": "789",
  "spinal-env-drive-plugin-digital_twin": "789",
  "spinal-env-drive-plugin-sync-file": "78",
  "spinal-env-drive-plugin-version_manager": "789"
} |
./.config_env/viewer.json
| Code Block | ||||||
|---|---|---|---|---|---|---|
| ||||||
{
  "spinal-env-viewer-plugin-sample": "1.0.0",
  "spinal-env-viewer-plugin-forge": "git+https://github.com/spinalcom/spinal-env-viewer-plugin-forge.git",
  "spinal-env-viewer-plugin-graph-manager": "git+https://github.com/spinalcom/spinal-env-viewer-plugin-graph-manager.git",
  "spinal-env-viewer-graph-service": "git+https://github.com/spinalcom/Spinal-Graph-Service.git",
  "spinal-env-viewer-plugin-scene": "git+https://github.com/spinalcom/spinal-env-viewer-
browser plugin-admin.gitLaunch spinal-system scene.git",
"spinal-env-viewer-plugin-version": "https://github.com/spinalcom/spinal-env-viewer-plugin-version"
} |
Now you need to compile them in order to work :
| Code Block | ||||
|---|---|---|---|---|
| ||||
~/button-system$ pm2 start launch.config.js |
| |||
./node_modules/.bin/create_driver_env # compile the driver

./node_modules/.bin/create_viewer_env # compile the viewer

./node_module/.bin/create_admin_env # compile the admin |
The Viewer's configuration is now done.
| Panel | ||||||||||||||||||||
|---|---|---|---|---|---|---|---|---|---|---|---|---|---|---|---|---|---|---|---|---|
| ||||||||||||||||||||
If you see a previously launched spinal-hub-7777 or spinal-hub-forge-7777 you need to delete them.
After deleting the old spinal-hub can now start your application with:
|
| Panel | ||||||
|---|---|---|---|---|---|---|
| ||||||
The drive, the admin and the viewer are browser applications. To use them you need to access them via a browser (you may change the host/port corresponding to your .config.json file): |
The default admin account is :
client ID
fine-wine-system Folder organization
.browser_organs : This is your web browser folder
.config_env : Your env configuration
nerve-center : The Spinalcom nerve center
node_modules : npm (node package manager) & spinal-package
.apps.json : installed package of your spinal system
.config.json : spinalcom connection configuration file
launch.config.js : Start your hub using pm2
package.json : config of your package
| title | Create a data model |
|---|
| title | Create our new virtualButton organ |
|---|
| title | Launch the system |
|---|
| title | Create our second organ : virtualButtonMonitor |
|---|
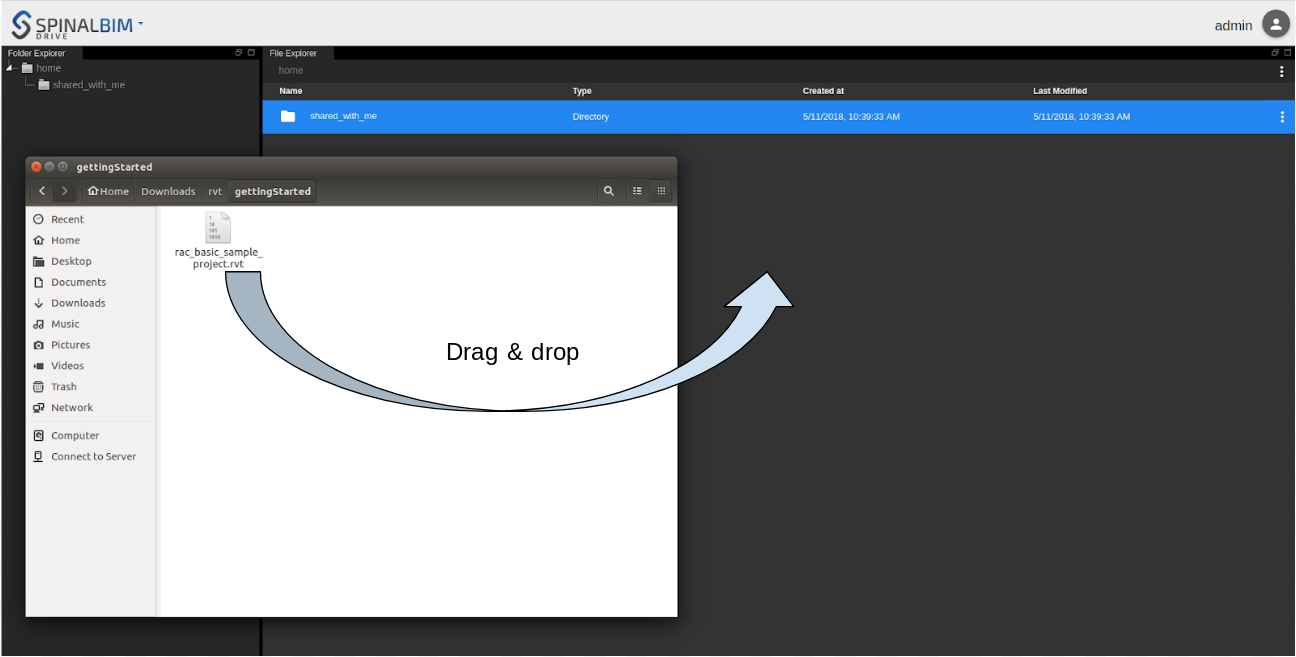
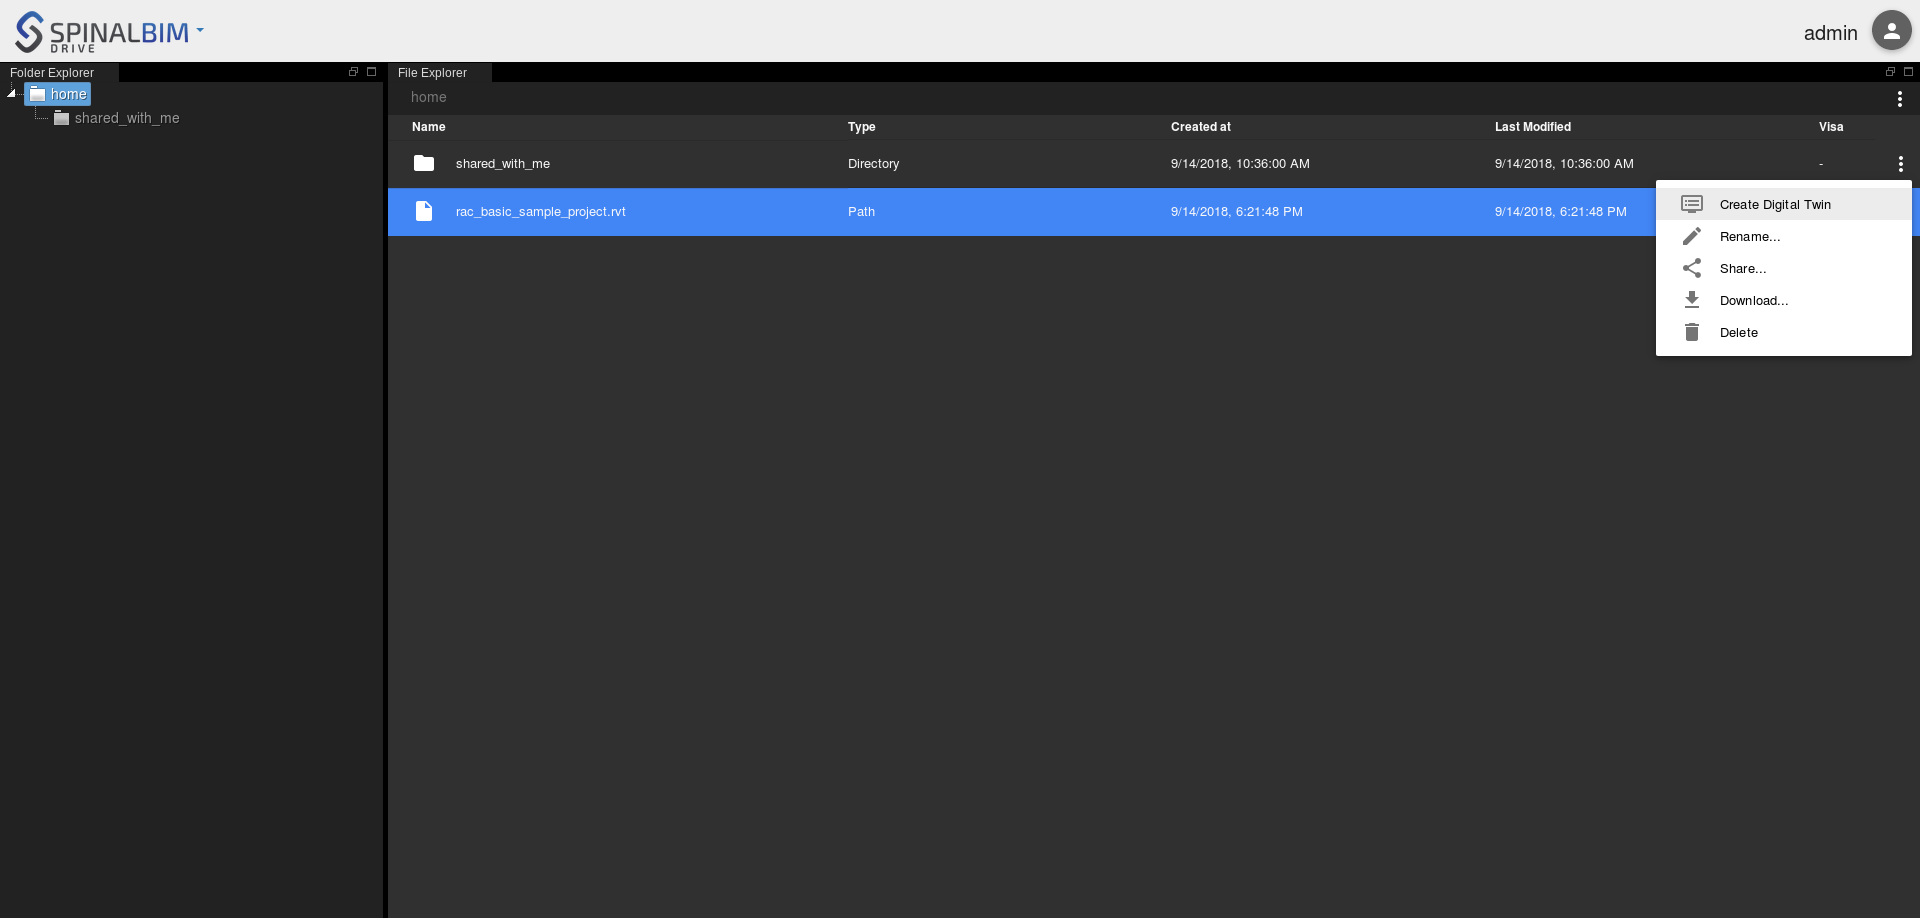
To create your digital twin you're going to need a rvt file. You can get one here: And, Once you have downloaded it, use your file manager to drag and drop it on the drive. Then right click on the .rvt and select the application "Create Digital Twin".
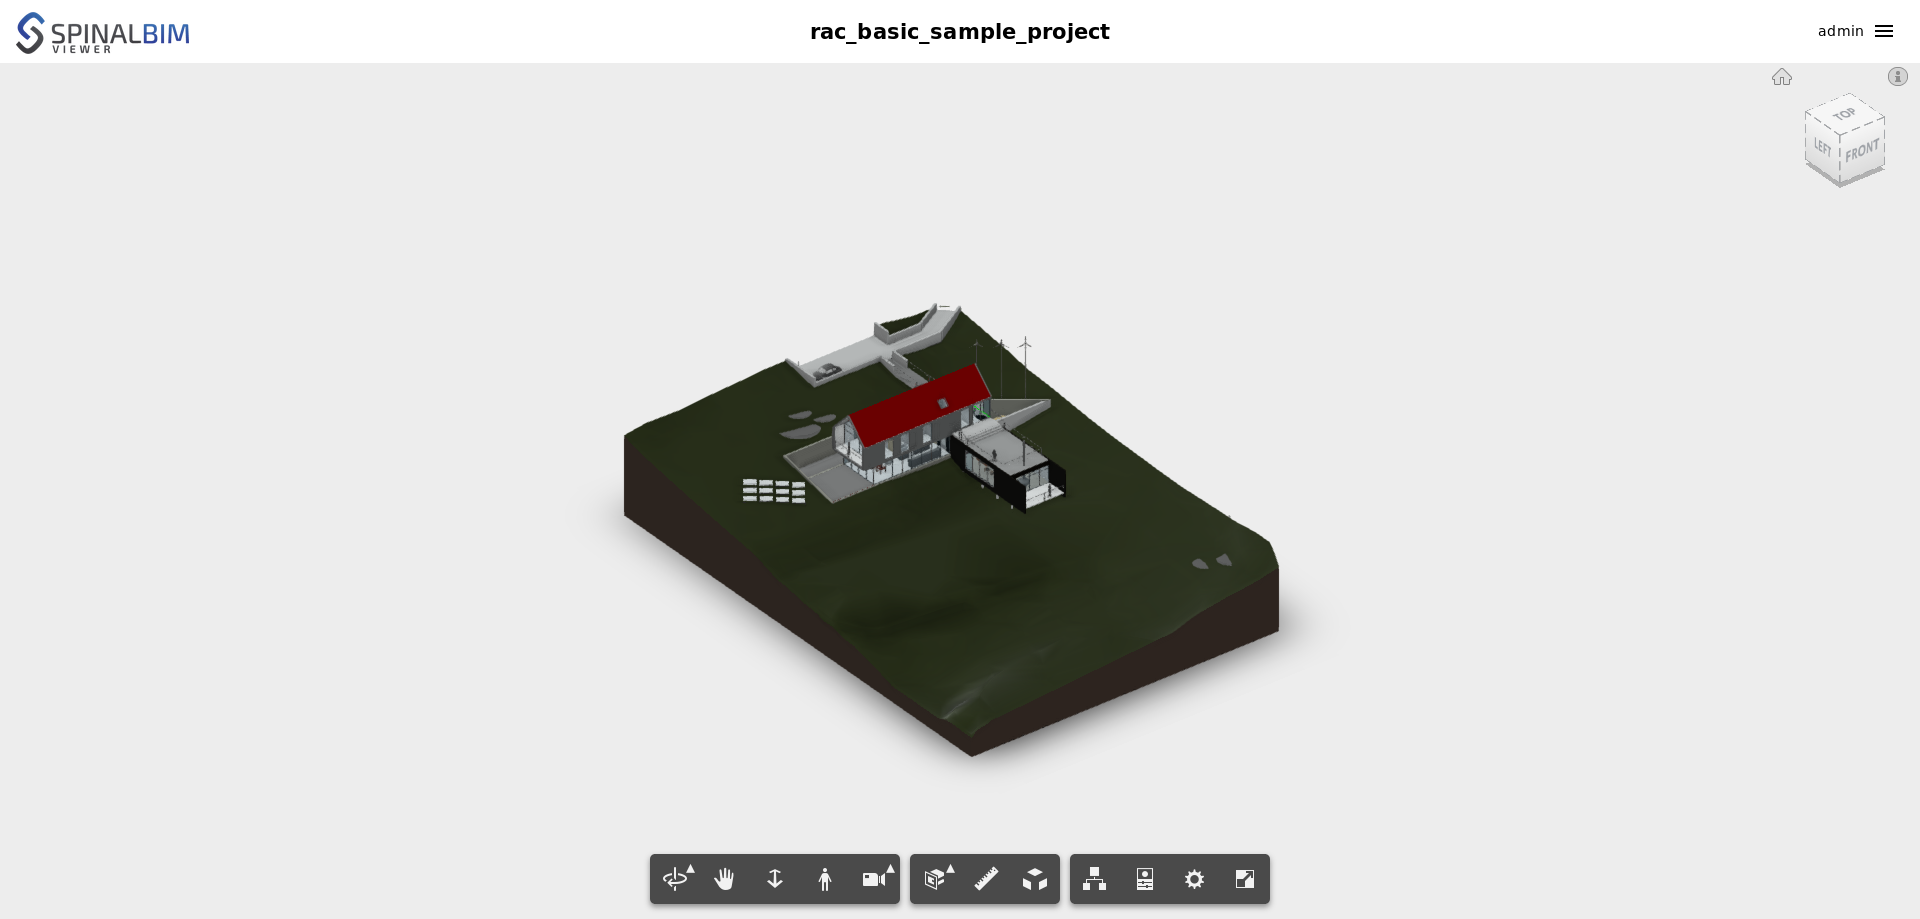
This will take a few minutes. Once this is done right click on the digital twin that was created and select Open with Op. Center Viewer. It will open a new tab with the viewer and load the 3D model of a house. |


